Explore The Course

Layout
| Back | A | B | Front | |
| FRONT 9 Par 36 |
3535 | 3200 | 2818 | 2452 |
| BACK 9 Par 36 |
3353 | 2966 | 2606 | 2240 |
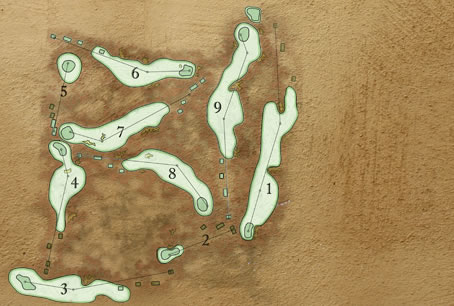
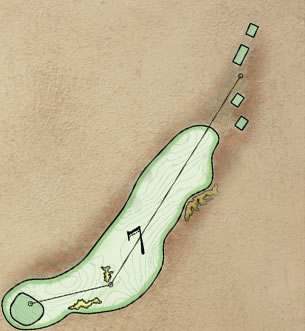
Hole 1 – Par 5
| Back | A | B | Front |
| 604 | 534 | 454 | 394 |
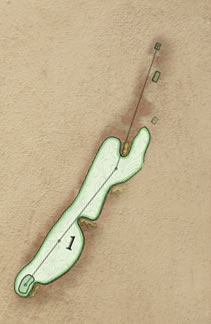 Splitting the fairway is a large blowout bunker that the player must decided whether to challenge it and play over or chose the left or right side of the fairway. Glimpses of the green rise above the dramatic rolls of the fairway, with the green nestled below the slope of the dune and a large blowout bunker. The green slopes back to front helping catch the player’s shot.
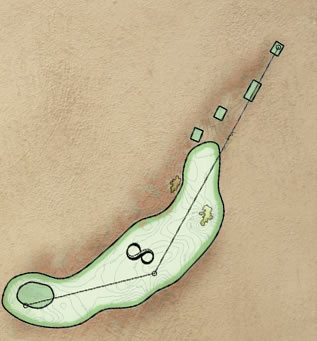
Hole 2 – Par 3
| Back | A | B | Front |
| 196 | 176 | 163 | 126 |
 A two tier bowled green partially hidden behind a ridge with a blowout fronting awaits the player. The steep slope between the upper and lower part of the green makes hitting the correct surface a must for any chance at birdie or even par.
Hole 3 – Par 4
| Back | A | B | Front |
| 424 | 374 | 326 | 276 |
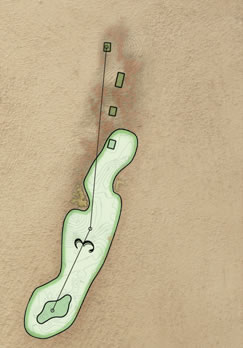 Players challenging the blowout on the right with a good drive are rewarded with a short shot into the snaking green. Playing safe to left of the blowout leaves the player with a longer second shot to the pushed up green that puts a premium on shot placement.
Hole 4 – Par 4
| Back | A | B | Front |
| 362 | 337 | 286 | 251 |
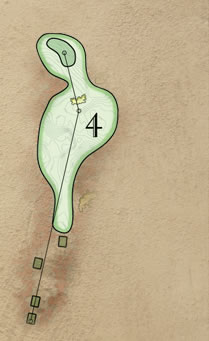 Threading the needle between two dunes the fairway opens up to a generous landing area. A large blowout beyond the landing area provides the player a target to air. The second shot is to an uphill green that slides away along the left edge and joins the 7th hole green to make one of the largest green complexes. The mounds and rolls of the double green provide multiple challenging pin positions.
Hole 5 – Par 3
| Back | A | B | Front |
| 199 | 177 | 155 | 133 |
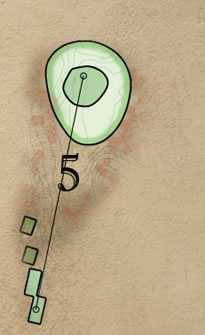 The multi-tiered green perched on a plateau, is nestled in among the dunes, and is protected along the left side by a large blowout bunker with multiple catch areas surrounding the green. Player’s must make sure they are accurate with their tee shot or be faced with a long winding putt.
Hole 6 – Par 4
| Back | A | B | Front |
| 404 | 364 | 331 | 264 |
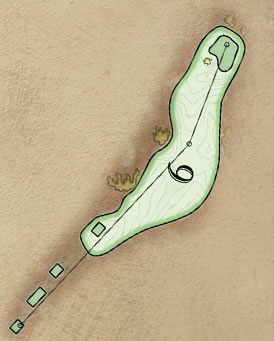 The green runs around a large ridge providing the hole with numerous challenging pin placements but getting it in the correct position off the tee is critical for conquering this hole. Guarded left and long by blowout bunkers the player must decide how much of the blowout along the left side they want to challenge to have a clear view of the green.
Hole 7 – Par 4
| Back | A | B | Front |
| 404 | 378 | 354 | 335 |
 A large landing area is protected by two blowouts scraped out of the fairway. With the large dune along the left side of the fairway the player’s perspective of the hole is toyed with as the fairway slides away into the distance along the dune. The green is combined with the 4th hole and has a series of large mounds dividing the green into two sections. Putting between the mounds can be a task for anyone.
Hole 8 – Par 4
| Back | A | B | Front |
| 429 | 364 | 327 | 296 |
 The player is hitting to an elevated fairway that winds its way between large blowout bunkers before opening up to a wide landing area to the green. The green is tucked behind the rolling dunes so it is not visible from the tee. The green sits up with a run out area to the right and a blowout fronting the left and wrapping around the left side of the green.
Hole 9 – Par 5
| Back | A | B | Front |
| 539 | 470 | 422 | 377 |
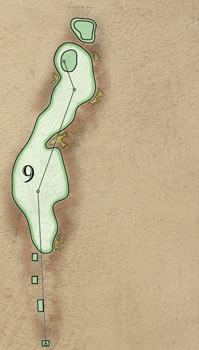 A 3 shot that meanders it’s way uphill between two large dunes to a receptive landing area. The player looks up to a green that sits high above with only the beautiful blue skies of Nebraska as a back drop. Blowout bunkers line the fairway leading up to the green. A large stepped green sits atop a ridge that falls away to the right of the player.
Hole 10 – Par 4
| Back | A | B | Front |
| 365 | 330 | 292 | 250 |
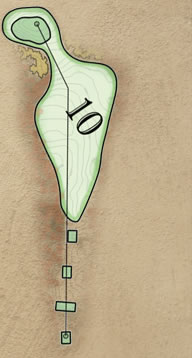 Hitting from an elevated green to a large fairway that is ringed by bunkers along its length, players must decided how far they want to hit their drive to reach the skyline green in two. The simple green is a breather from the previous holes and what is to come later on in the round.
Hole 11 – Par 3
| Back | A | B | Front |
| 189 | 157 | 123 | 98 |
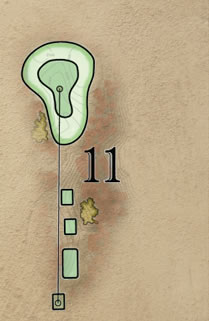 A natural bowled green that is nestled amongst the dunes, a small slope runs across the green dividing the green into two distinct sections. A blowout wraps itself in the dune along the left side of the green. A player can hope for a lucky bounce around the green thanks to the natural shape of the land.
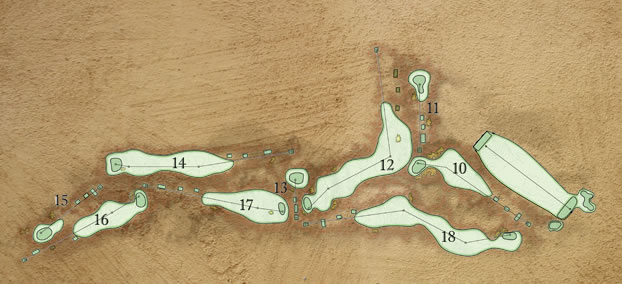
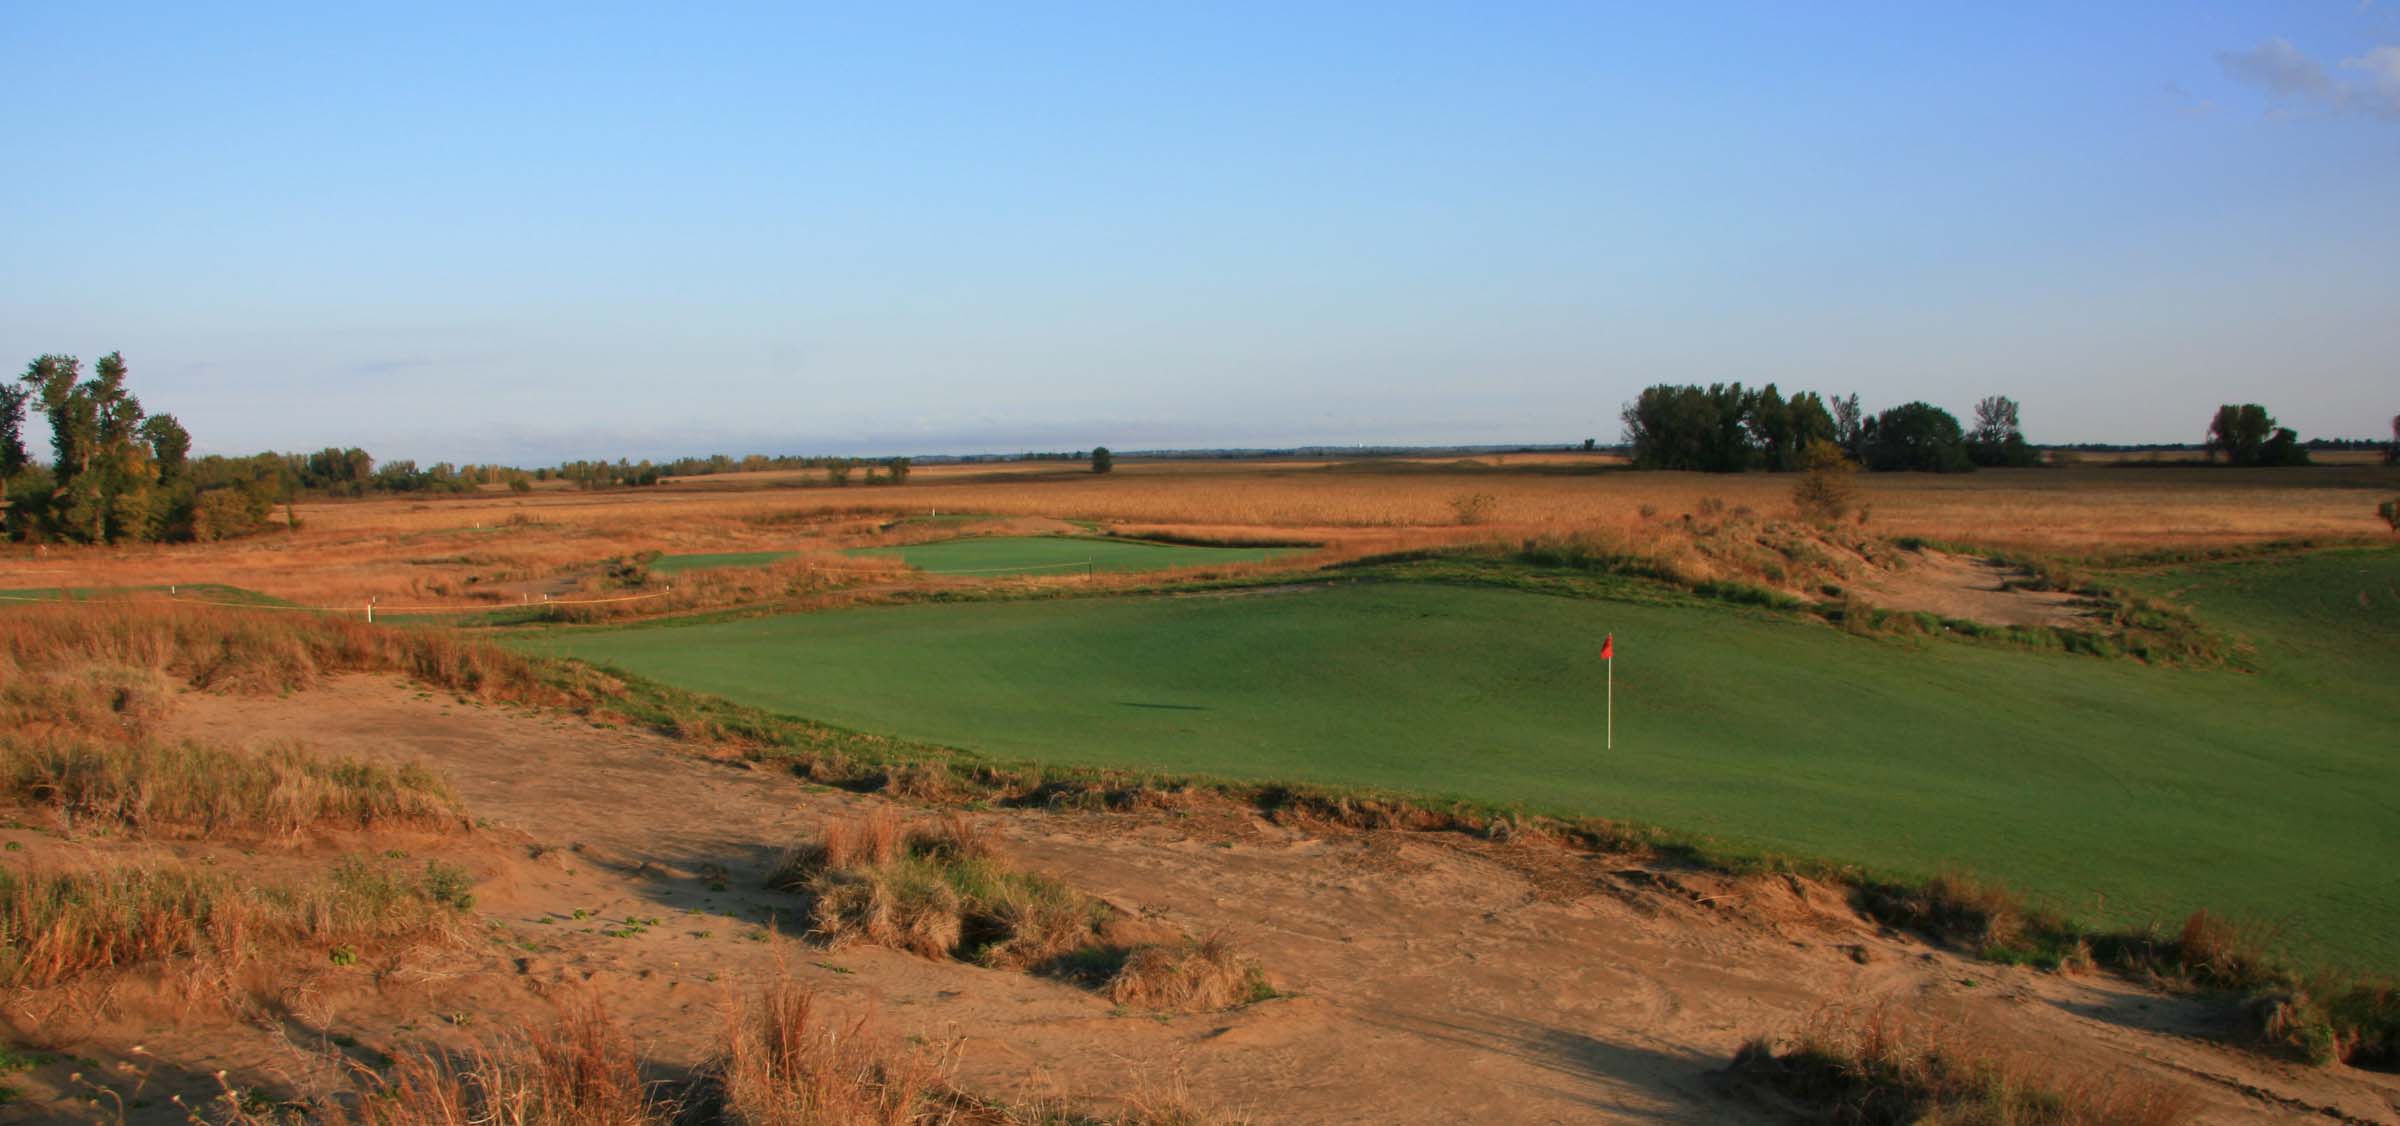
Hole 12 – Par 5
| Back | A | B | Front |
| 587 | 508 | 468 | 416 |
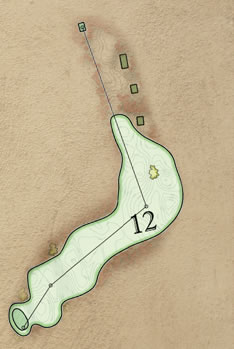 A hundred yard wide fairway allows the player a very generous landing area. A dramatic second landing area brings in the randomness of nature and asks the player to challenge it. The green is tucked between two ridges that have large blowouts running across the face hiding all but the front face of the green from the first landing area. The golfer must decide the best place for their second shot.
Hole 13 – Par 3
| Back | A | B | Front |
| 109 | 88 | 78 | 58 |
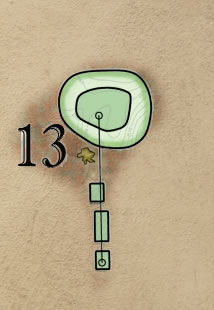 This short hole with a large green that rolls and falls with the natural contours of the surroundings is an easy target for the players but they must make an accurate shot to the cup which can be hidden in any nook or knoll of the green. Missing the pin position can bring bogey and double bogey into play even though you may be on the green after your tee shot.
Hole 14 – Par 5
| Back | A | B | Front |
| 508 | 439 | 374 | 333 |
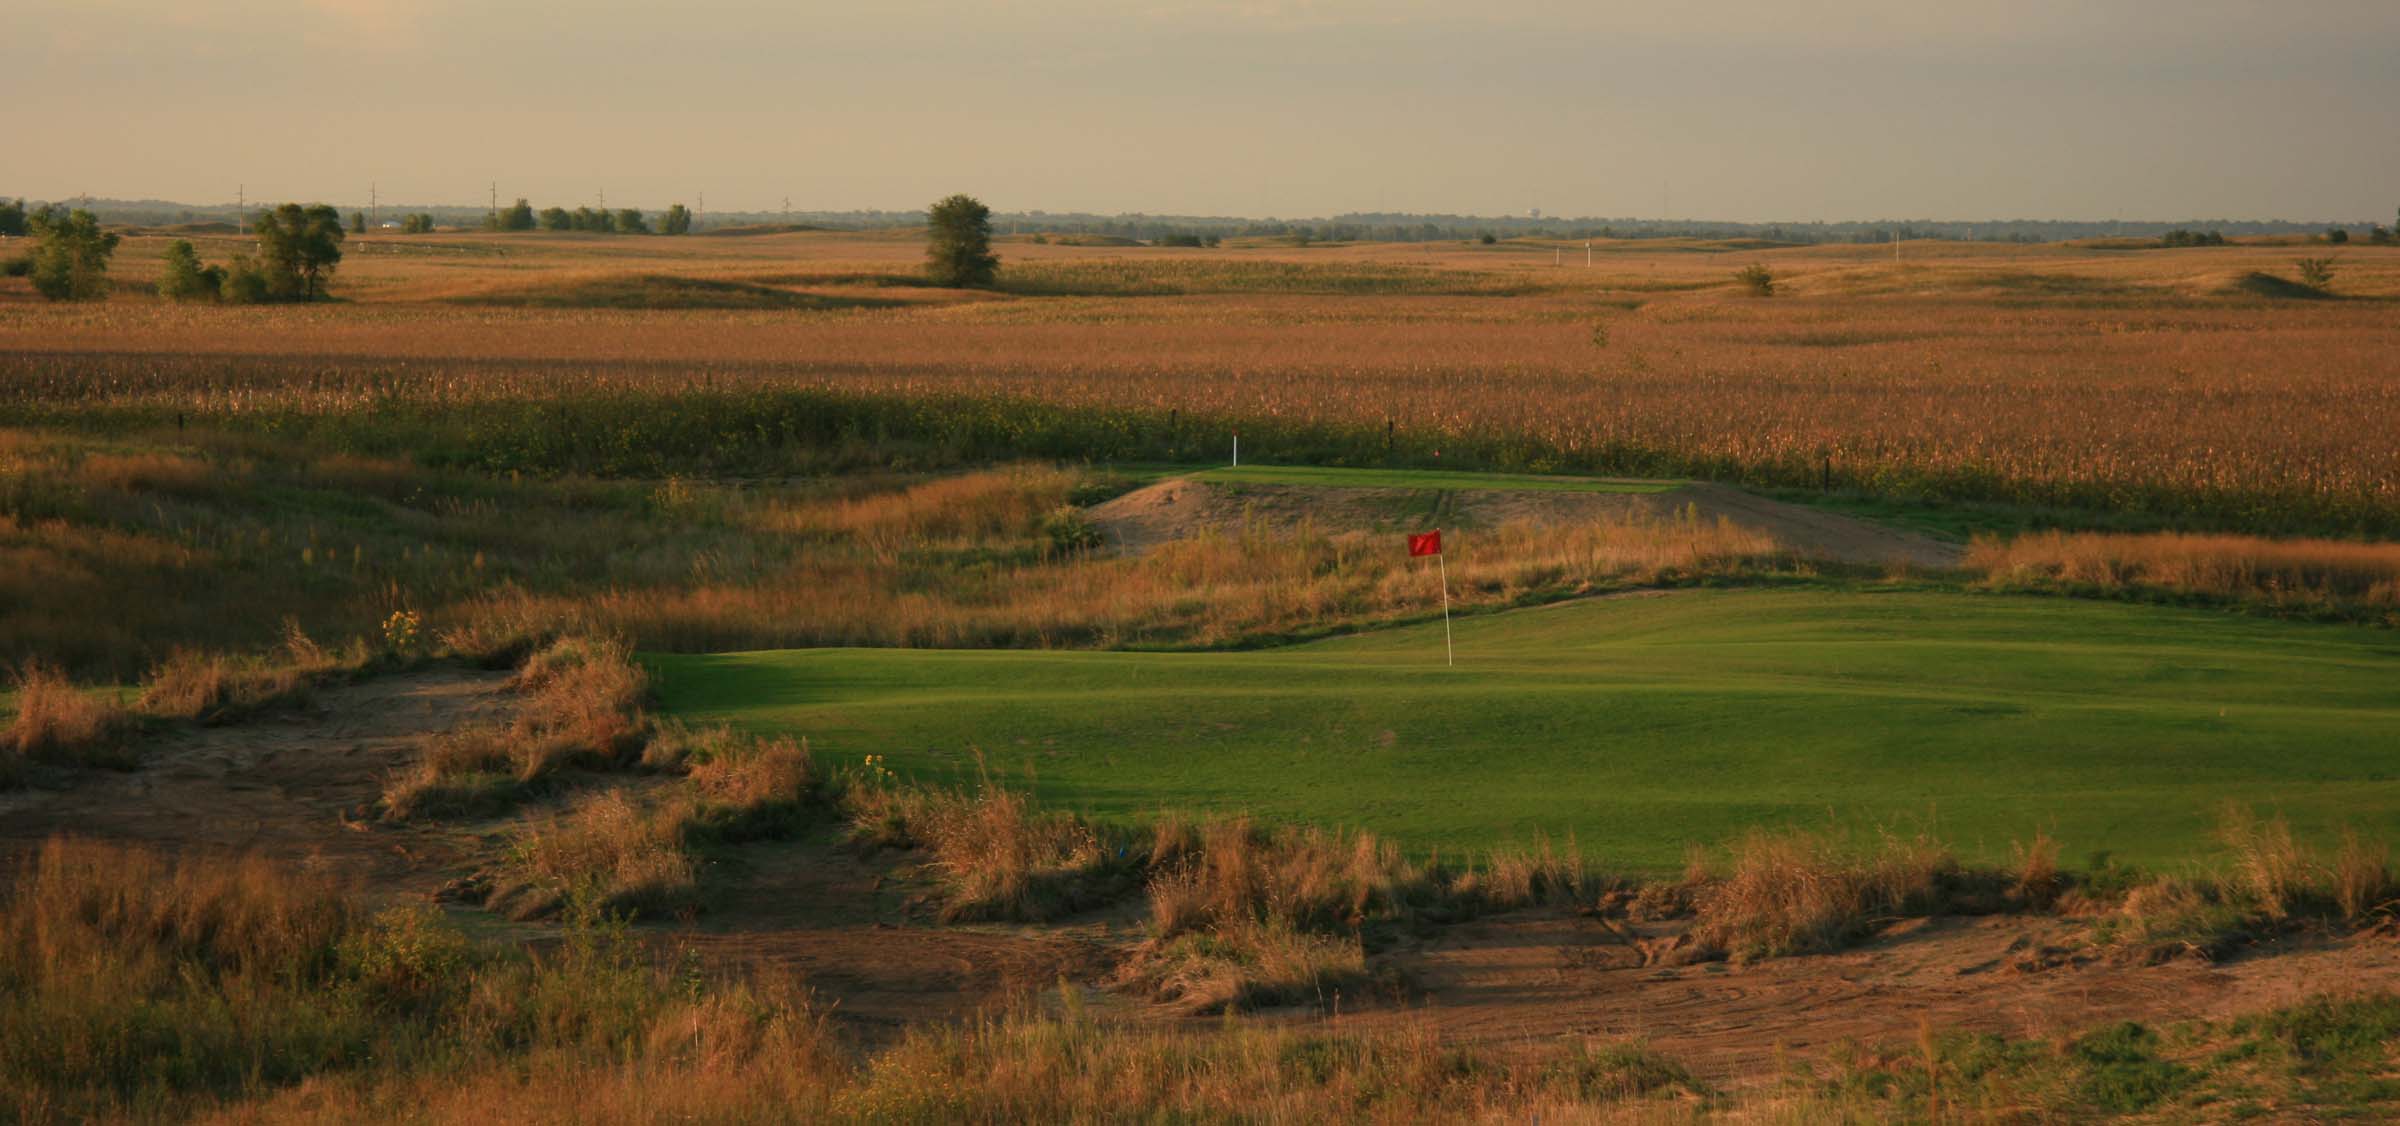
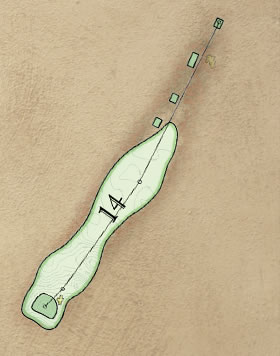 A short par 5, the risk for the player is all in the second shot. After hitting the tee shot to a wide fairway. Sitting high above on a dune in front of the golfer the green dares you to go for it in two which might be your best option instead of laying up short and having what some say is one of the toughest shots in golf, a 30 yard pitch shot off of bent grass. Either way the player must make excellent shots to reach this green in regulation when on the scorecard it appears to be a good scoring opportunity.
Hole 15 – Par 3
| Back | A | B | Front |
| 212 | 194 | 168 | 135 |
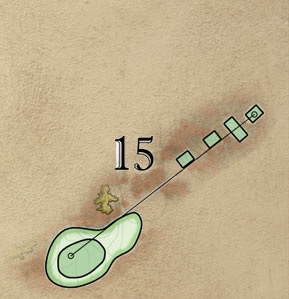 A downhill tee shot to a green with very subtle movements across the green running to the player’s right. Behind the blowout on the left the fairway rings this large green, sitting down surrounded by the native prairie grass, it presents a different challenge then what the players have faced leading up to the 15th.
Hole 16 – Par 4
| Back | A | B | Front |
| 373 | 338 | 287 | 222 |
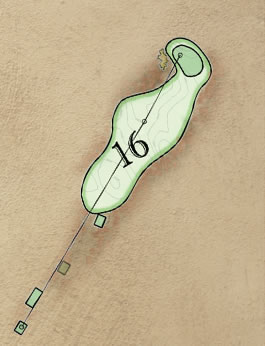 The green sits benched in above a series of blowouts that pinches in the fairway short of the green. A sloping bank behind the green gives the player a surface to play to in order to avoid the blowout. Playing right of the green you are able to run the ball onto the green. Beware of the trees which are one of the few places they come into play. If you play your tee shot too far left the trees and the blowouts will obscure your view of the green.
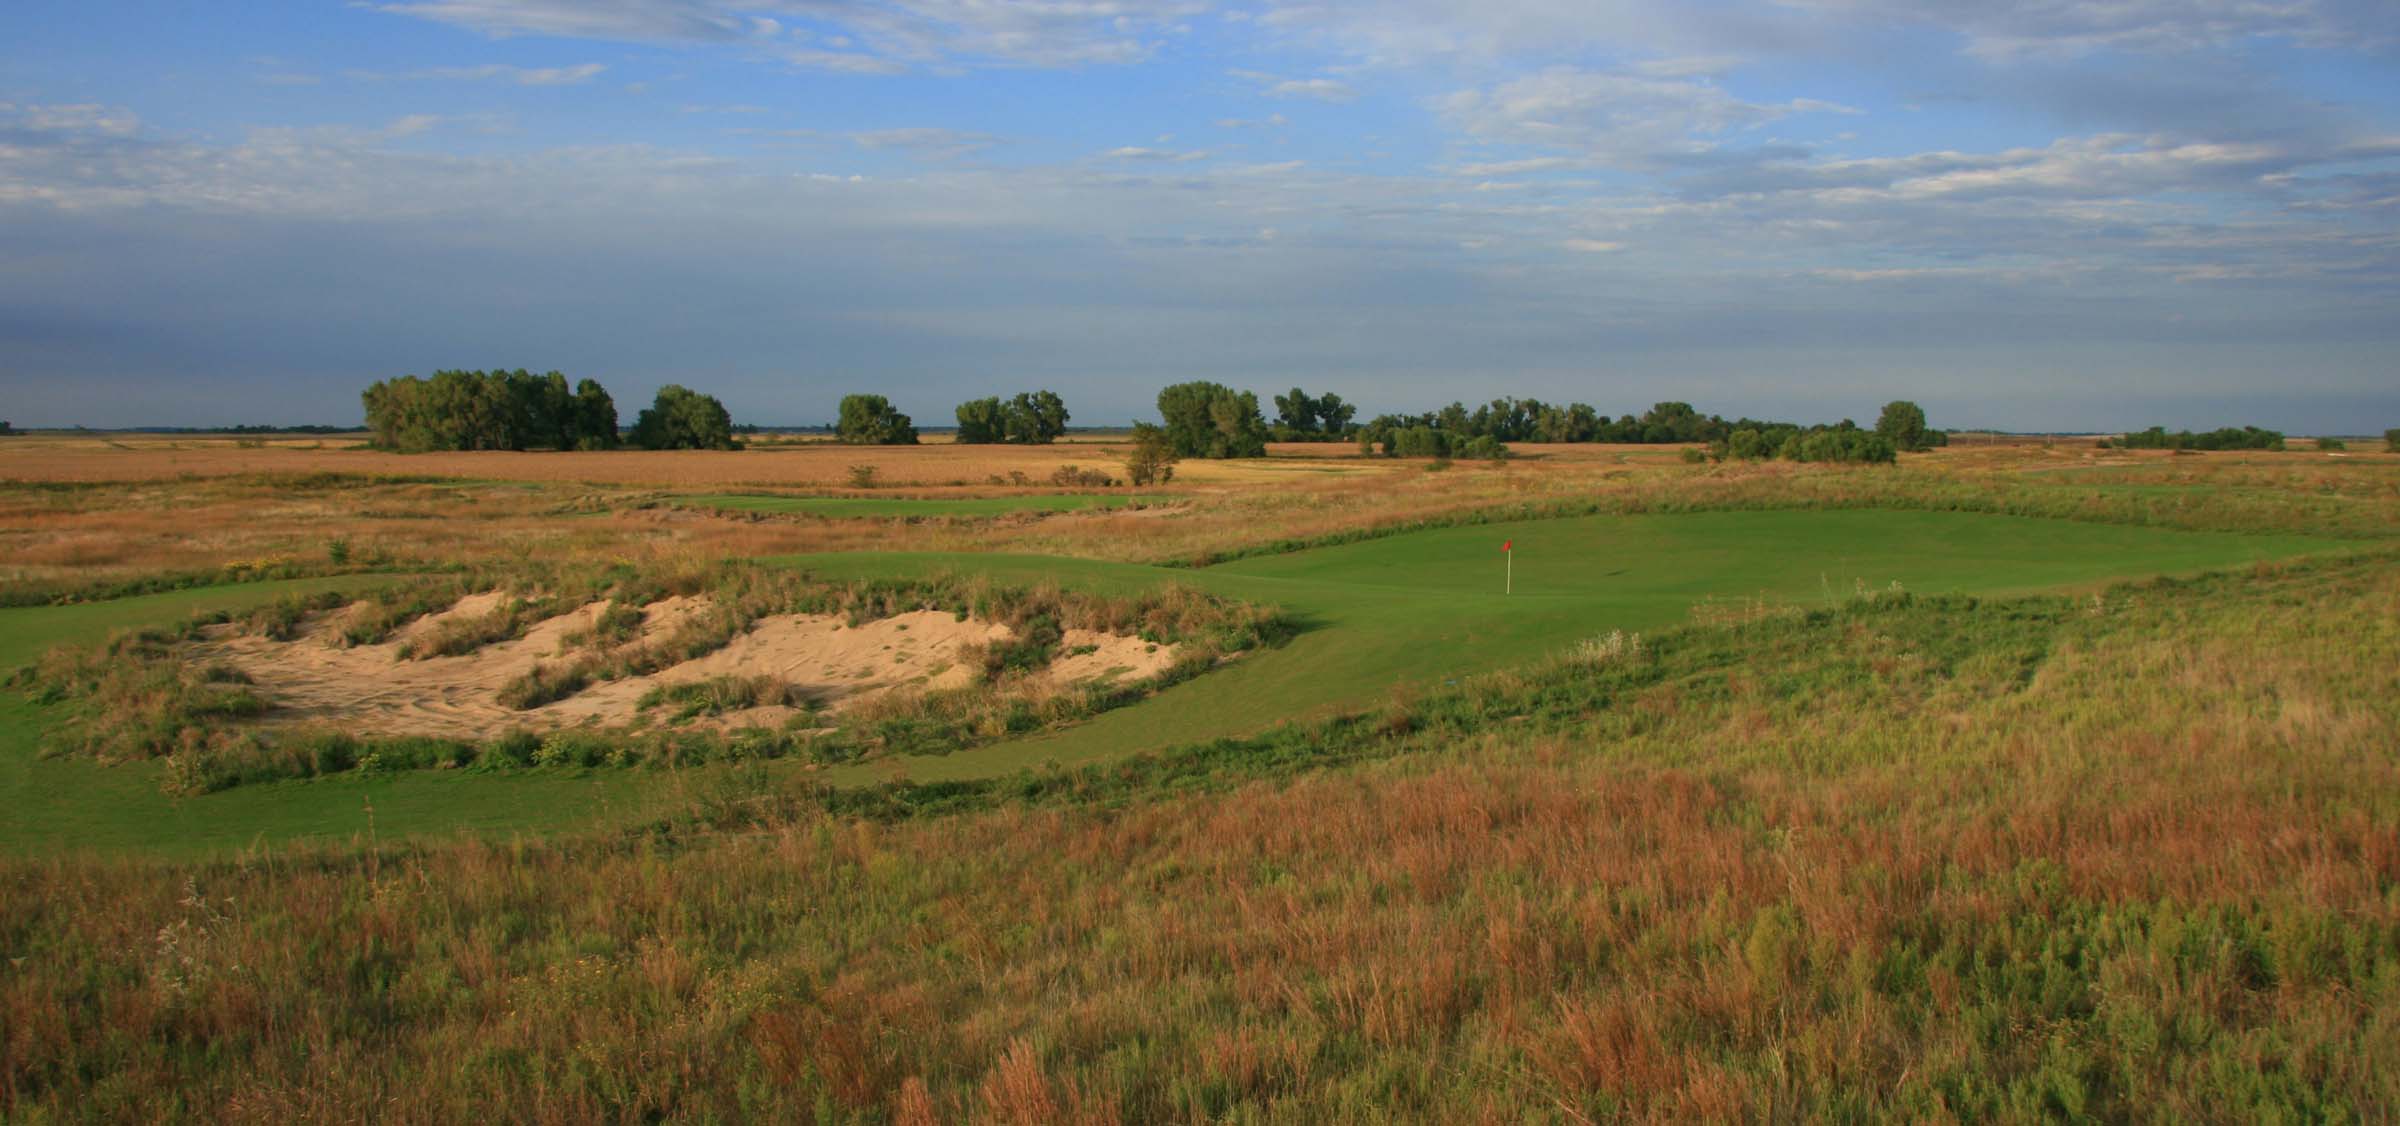
Hole 17 – Par 4
| Back | A | B | Front |
| 398 | 350 | 301 | 255 |
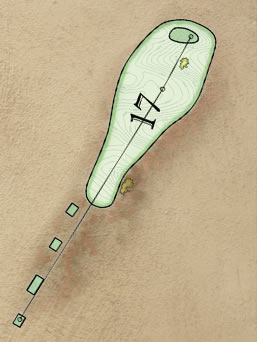 From the tee box the player is faced with a large blowout that runs the length of the dune that protects the green from the golfers view. Dunes and ridges cross the fairway hide the landing area from the golfer. A good tee shot leaves them with a short shot into the natural bowl green nestled behind the large ridge with the blowout. Hit a good second shot and you are looking at birdie.
Hole 18 – Par 5
| Back | A | B | Front |
| 612 | 562 | 515 | 473 |
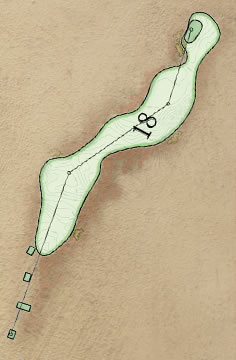 The longest hole on the course leads the golfer out of the dramatic dunes towards the clubhouse. Take aim at the blowout at the end of the fairway before it winds right and you have a good view of the second landing area. The green sits perched above a bank of blowouts with a sloping fairway to the right.